Six Cheap ND Kits, One Waterfall, and How Slow You Can Actually Go
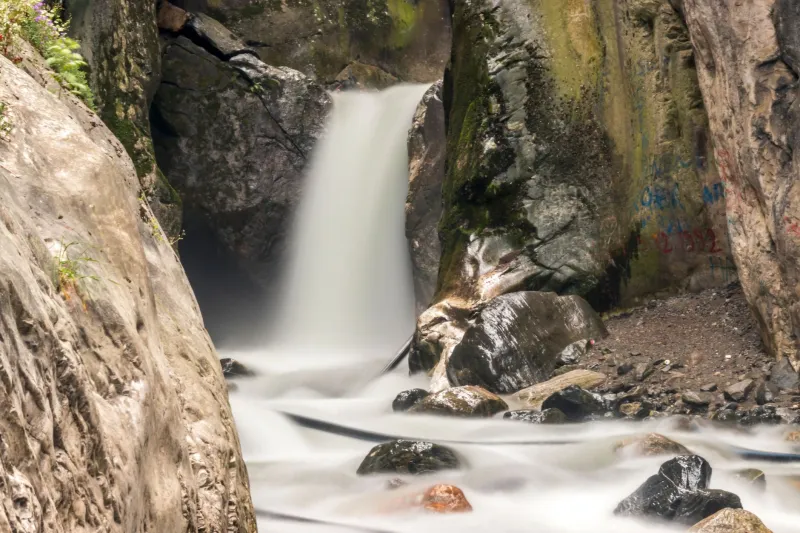
There is a specific kind of disappointment that comes from driving two hours to a waterfall, clamping a $22 piece of tinted plastic over your phone lens, and discovering that the water still looks like water and your whites now look like a bruise.
I did that drive. I did it with six kits, a tripod, and a creek in the Catskills that runs hard enough in November to make the test worth something. Here's what survived.
Why anyone puts an ND on a phone in the first place
Your phone shoots at a fixed, fairly wide aperture, and it will happily fire at 1/2000 of a second on a bright day. That's great for freezing a dog mid-air and terrible for everything that looks better with a little smear: water, traffic, a crowd crossing an intersection, clouds moving over a ridge.
An ND filter is sunglasses for your lens. It cuts light so the camera is forced to a longer shutter speed for the same exposure. That's the entire concept. It is not magic and it does not improve image quality in any other way.
The honest math matters here. Getting from 1/2000 to a two-second exposure is roughly twelve stops of light. A six-stop filter gets you to about 1/30. A ten-stop filter gets you into the neighborhood of a second. Almost every cheap kit on the market is sold in vague "ND2 to ND400" language, and ND400 is about nine stops at best and usually less in practice once the coating is doing whatever it's doing.
The six kits, described by what you're paying for
No brand names, because the point is the category, not a scoreboard:
- The $15 universal clamp. Spring-loaded plastic jaws, three filters in a little pouch, fits any phone. It also fits badly.
- The $22 screw-on set with an adapter ring. Small metal rings that stick to the phone or case, filters thread on. Feels serious.
- The $30 magnetic kit. Same idea, magnets instead of threads. Pops on and off in about a second.
- The $40 variable ND. Rotating ring advertised as 2 to 8 stops. It's two polarizers stacked, which is why it's variable and also why it does a thing I'll get to.
- The $18 three-pack with a phone case included. Case, clamp, ND8, ND16, CPL. Everything you need in theory.
- The $55 magnetic kit with a clip-on grip and a case. The overachiever, and priced like it.
Test one: color cast
I shot a plain white wall in open shade with each filter, locked white balance, and compared the files. Three of the six introduced a visible magenta or green shift. The $40 variable unit was the worst offender, and it got worse as I rotated it toward max density, which is a known quirk of stacked polarizers and not a manufacturing defect. The two magnetic kits were the cleanest, with cast small enough that a single white balance nudge fixed it.
Here's the practical takeaway: always shoot raw, or at least set a custom white balance with the filter on. A two-second fix in editing erases this entire category of problem. If you're shooting JPEG and letting auto white balance guess, a cheap filter will make your snow look like grape soda.
Test two: vignetting and fit
This is where the cheap kits actually lose. On a phone with three lenses crammed into a corner, a clamp that covers one lens is often casting a shadow on another, and the jaws themselves show up at the corners of an ultra-wide shot. The $15 clamp vignetted hard enough to be visible on a 4x6. The included-case kit was worse, because the case's own lip plus the clamp created a light leak along one edge in direct sun.
The magnetic and screw-on rings did much better. They sit flatter, they're small, and they don't creep. If you shoot anything wider than the main camera, buy a ring-style kit or skip the filter entirely.
One more fit note: magnets and phone stabilization do not always get along. I had one kit slide about a millimeter during a pan on a gimbal. Check the seating before every setup.
Test three: how many stops, really
The variable unit claimed 8 stops. Measured against an unfiltered frame with everything else locked, it delivered about 6.5 at the marking and roughly 8 at maximum, with a noticeable dark X pattern across the frame when pushed there. The fixed filters were honest: the ND8 was close to three stops, the ND16 close to four, and stacking the two got me about seven.
Seven stops in bright daylight put me at roughly 1/15 to 1/8 of a second at base ISO. That is not silky. That is "slightly soft." For the actual waterfall look, I needed to stack everything or accept the phone's own long-exposure mode.
Test four: app compatibility and the shutter ceiling
This is the part nobody mentions. Your native camera app may refuse to go past a certain shutter speed in auto mode, and many phones simply don't expose manual shutter control at all. Third-party apps mostly solve this, but not all of them read the light the same way, and a couple got confused enough by a dense filter to hunt for focus.
Test your app before you leave the house. Put the filter on, point it at something bright, and confirm you can lock focus and actually hit the shutter speed you want. I lost twenty minutes at the creek to a focus hunt that a five-minute driveway test would have caught.
What actually worked on the water
The winning combination was not the most expensive filter. It was the ring-style kit plus a third-party camera app with manual shutter, on a small tripod, at about a half second. Not two seconds. Half. At half a second, falling water turns into streaks with structure still in them, and that is a look most people prefer anyway. Fully smooth water reads as fog and stops telling you anything about speed or volume.
If you want the two-second version, use the phone's built-in long exposure on a Live Photo or the equivalent mode on Android. It stacks frames, it's cleaner, and it costs nothing.
So when is an ND filter actually the right tool?
It earns its place for video. This is the strongest argument and it barely gets made. Shooting 24 frames per second with a 180-degree shutter means you want 1/48 of a second, and on a sunny sidewalk your phone will not get there without help. A three- or four-stop filter does that job perfectly, and the motion looks dramatically more cinematic than the default jittery footage.
It earns its place for intentional blur in bright light. Panning a cyclist, blurring a crowd, streaking taillights at dusk when the sky is still bright.
It does not earn its place if you shoot mostly photos at golden hour, if you already like the phone's synthetic long exposure, or if you're the type who buys a gadget and keeps it in a bag for a year. Six kits, and the truth is that two of them did a job no app could do and four of them did a job an app did better.
The verdict, briefly
The rule I came home with: buy one ring-style kit with a real 3-stop and a real 6-stop filter, use it for video and for daylight panning, and stop trying to make your phone do a ten-stop landscape shot it was never built for. Skip the variable units. Skip anything with spring-loaded plastic jaws. And bring a cloth, because creek spray on a coated filter is a fifteen-minute problem.
The waterfall looked good. The two hours of driving looked better once I stopped blaming the filter for what was really a shutter-speed problem.